This is the leading choice of other customers purchasing products related to coding with scratch blocks and scripts for dummies. To get more options, take a look at our recomendations of Coding With Scratch Blocks And Scripts For Dummies or use the search box.
Table of Contents
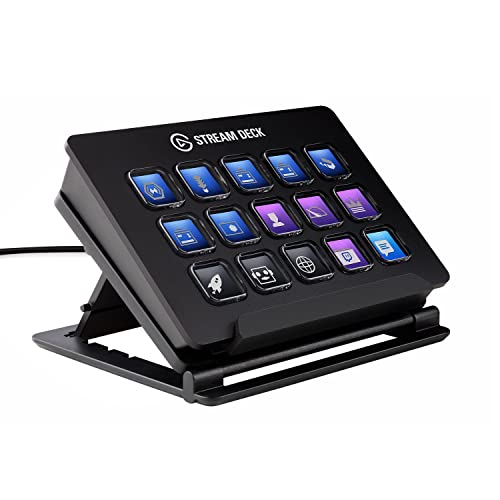
- 1 Elgato Stream Deck Classic - Live production controller with 15 customizable LCD keys and adjustable stand, trigger actions in OBS Studio, Streamlabs, Twitch, YouTube and more, works with PC/Mac
- 2 Coogam Wooden Blocks Puzzle Brain Teasers Toy Tangram Jigsaw Intelligence Colorful 3D Russian Blocks Game STEM Montessori Educational Gift for Kids (40 Pcs)
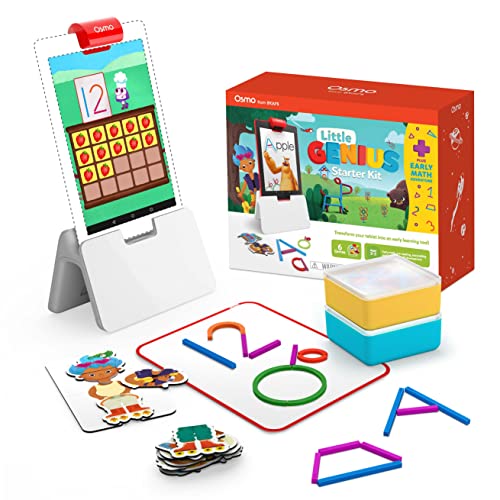
- 3 Osmo - Little Genius Starter Kit for Fire Tablet + Early Math Adventure - Valentine Toy - 6 Educational Games-Counting, Shapes & Phonics-STEM Gifts-Ages 3 4 5(Tablet Base Included)
- 4 Kids Tactical Vest Kit for Nerf Guns N-Strike Elite Series with Refill Darts Dart Pouch, Reload Clip Tactical Mask Wrist Band and Protective Glasses for Boys & girls
- 5 SOL DE JANEIRO Brazilian Bum Bum Cream 75ml
- 6 Educational Insights Kanoodle 3D Brain Teaser Puzzle Game, Featuring 200 Challenges, Stocking Stuffer, Gift for Ages 7+
- 7 Fahrenheit 451
- 8 Snap Circuits Jr. SC-100 Electronics Exploration Kit, Over 100 Projects, Full Color Project Manual, 28 Parts, STEM Educational Toy for Kids 8 +
- 9 I'm Dead, Now What?: Important Information About My Belongings, Business Affairs, and Wishes
- 10 Macbeth (Folger Shakespeare Library)
Elgato Stream Deck Classic - Live production controller with 15 customizable LCD keys and adjustable stand, trigger actions in OBS Studio, Streamlabs, Twitch, YouTube and more, works with PC/Mac
- Tactile Live Production: easily control your favorite tools and platforms.
- 15 Customizable LCD Keys: instantly trigger unlimited actions with a tap.
- Multi Actions: tap once to launch multiple actions simultaneously or sequentially with time intervals.
- Smart Profiles: create unique key configurations for different apps, and switch between them on the fly.
- Powerful Integrations: Elgato 4KCU, OBS, Twitch, YouTube, Twitter, Discord, Spotify, Philips Hue, vMix, VoiceMod, and more.
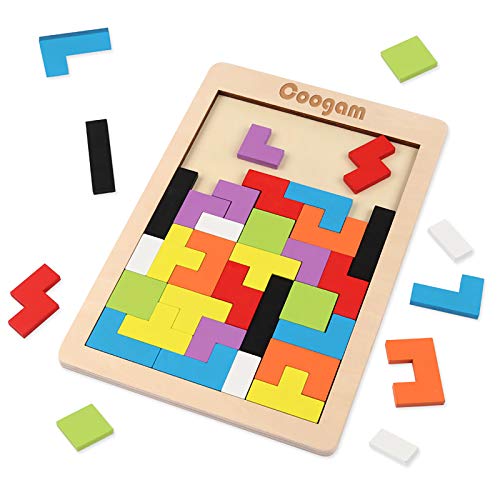
- Wooden Blocks Puzzle are made of natural and healthy basswood with high quality and smooth surface. Harmless paint ensure safe play. It contained 40 pcs with a reasonable sized board ( Length: 10.6" Width: 7 " Height: 0.39")
- Wooden Toys Tangram Brain Teaser Puzzle Game have several examples for shapes and things to make with it, each time you mixed up the pieces the puzzle would come out differently. such as pistol, human, robot, tree, umbrella, flower, pyramid, airplane and etc.
- The simple design and bright colors are perfect for sparking any imagination, and it feels great to challenge kids with this tangram jigsaw puzzle but also to just take on an easy challenge that you can complete differently every time. Perfect for times when you or your child just need to calm down or relax.
- Geometric Assembling Russian Blocks use common geometric patterns and colors to keep children busy for different options to play. Solving it themselves helps to keep kids’ brain focused and adds creativity to eye-hand coordination and color & shape recognition. It's better than on screen!
- Awesome wooden Intelligence puzzle for kids, and great fidget toy for adults. This traditional teaching mathematics puzzle always being attracted in both young kids and elderly people. Perfect ultimate gift idea as Christmas Gift / Birthday Gift/ Festival Gift.
Osmo - Little Genius Starter Kit for Fire Tablet + Early Math Adventure - Valentine Toy - 6 Educational Games-Counting, Shapes & Phonics-STEM Gifts-Ages 3 4 5(Tablet Base Included)
- Actual product packaging may vary from the image displayed. Components within the box remain the same. OSMO IS MAGIC: Fun-filled & award winning learning games. Children interact with actual hand held pieces & Fire Tablet, bringing a child's game pieces & actions to life (No WiFi necessary for game play). An Osmo Base is included, a Fire Tablet is not included, both are required for game play..Ideal for ages:3 years and up
- TEACHING: Use Sticks & Rings for 4 creative games: Fill a magic mansion with furniture & incredible things you create exploring shapes & colors (Shape Builder)! Practice counting as you build numbers creating a town of buildings & friendly animals (Counting Town). Learn letter formation & phonics with 300+ words (ABCs), creating images in 5 playgrounds & watch them come to life on screen (Squiggle Magic). Use Costume Pieces for 2 fun games: Experiment with clothes & colors to make party outfits, watch characters react (Costume Party) solve creative stories & find solutions to obstacles.
- SKILLS LEARNED: Get kinder-ready with Osmo! EARLY MATH (number recognition, counting, shapes). EARLY READING (letter formation, pre-reading, phonics, age-appropriate vocabulary) OTHER ESSENTIAL LIFE SKILLS (fine-motor skills, attention to detail, social-emotional, imagination, critical thinking, empathy, problem solving, early literacy, colors, emotions, spatial reasoning). Osmo sees and reacts to real-life movement. Geared towards children & love of learning.
- AGE & CAPABILITY: Ages 3-5+. Games in this set are for our youngest age group. Osmo enables the continuation of learning. Real-time audio and visual feedback lets children learn through experimentation in a stress-free environment.
- WHAT'S IN THE BOX: Osmo Base & Reflector for Fire Tablet, 19 cardboard pretend play Costume Pieces, 38 silicone Sticks/Rings (BPA Free and Dishwasher Safe) to practice letter, number & shape forming, silicone game play mat, stackable storage for game pieces & 6 Game Apps: Shape Builder, Counting Town, ABCs, Costume Party, Stories, and Squiggle Magic.
- COMPATIBILITY FOR FIRE TABLET: Fire HD 8 (8th, 10th & 12th Gen) & Fire HD 10 (9th & 11th Gen). Fire Reflector 2021, sold separately, required for the: Fire HD 8 (10th & 12th Gen) & Fire HD 10 (11th Gen). The minimum FireOS version needed is 7. Fire 7 (2022) will not be made compatible with Osmo products.

Kids Tactical Vest Kit for Nerf Guns N-Strike Elite Series with Refill Darts Dart Pouch, Reload Clip Tactical Mask Wrist Band and Protective Glasses for Boys & girls
- ►Tactical vest for Nerf fans: plenty of room for nerf darts, magazines and even small blasters. Kids will be fitted and ready for battle!1
- ►The stylish and personalized tactical vest has lots of room for a lot of equipment, lets your boys decisive tactical advantage for Nerf wars. Enjoy outdoor games with friends!
- ►Eye protection and sunscreen come on down for much fun in nerf game. With super cool design, the vision gear and tactical mask will keep you from being hurt.
- ►This Tactical Vest Kit includes: 1 x Vest; 1x Dart Pouch; 1 x Tactical Mask; 1 x Reload Clips; 1 x Protective Glass; 1 x Wrist Band; 30 x refill darts. Enough firepower for Nerf guns wars!
- ►💚Perfect Birthday Presents and Christmas Gifts! 💚This Tactical Vest kit carry more ammo on the move and are loved by children of all ages: 3-14 years old.Surprise gift to children for birthday, Christmas, Thanksgiving or any other holiday.

SOL DE JANEIRO Brazilian Bum Bum Cream 75ml
- SMOOTHS & TIGHTENS: Fast absorbing body cream for your bum bum, legs, tummy - and all over - contains Guaraná to tighten and smooth the appearance of skin.
- HYDRATES & SOFTENS: Brazilian Beauty Blend of Cupuaçu Butter, Açaí Oil, and Coconut Oil softens while a light mica shimmer creates an all-over highlighting gorgeous glow.
- DELICIOUS FRAGRANCE: Pistachio and Salted Caramel fragranced body lotion cream. Non sticky and non greasy.
- FORMULATED WITHOUT: Cruelty free, vegan, gluten free, soy free, paraben free, free of artificial colorant, 5 free, 3 free, phthalate free, paraben free, no PEGs, talc free, sulfate free, mineral oil free, nut free.

- TIKTOK MADE ME BUY IT–OVER 4 MILLION SOLD! Millions of players around the world can’t get enough of this best-selling, award-winning, brain-bending, puzzle game
- INCLUDES 200 PUZZLES! Kanoodle includes 200 addicting 2D & 3D puzzles from beginner basic to deviously difficult; there are hundreds of possible combinations, but only one correct answer
- 2D & 3D BRAIN TEASER PUZZLE GAME: Kanoodle is a brain teaser puzzle game that includes 12 puzzle pieces, 200 puzzle challenges, a 48-page illustrated puzzle book, and a carrying case. Perfect brain teaser, travel game
- THE PERFECT STOCKING STUFFER! Our puzzle games and brainteaser games are the perfect stocking stuffer gift for kids, teens, and adults!
- MADE FOR ALL AGES: For anyone 7 to 107! Kanoodle is the perfect brain-bending puzzle game
Fahrenheit 451
- Fahrenheit 451;9781451673319;1451673310
- Ray Bradbury (Author)
- English (Publication Language)
- 249 Pages - Simon & Schuster (Publisher)
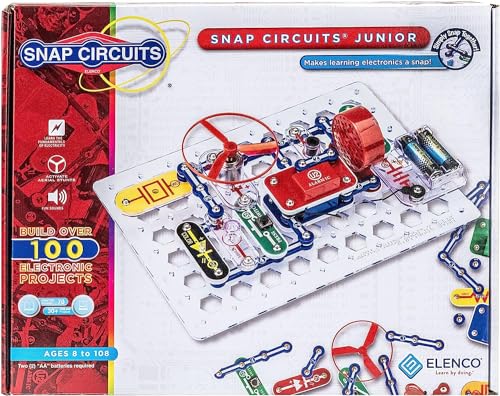
Snap Circuits Jr. SC-100 Electronics Exploration Kit, Over 100 Projects, Full Color Project Manual, 28 Parts, STEM Educational Toy for Kids 8 +
- SO MANY TOYS IN A SNAP: Make dozens of cool electronic gadgets - all from one box! A safe and fun way to introduce children ages 8+ to the basics of electrical engineering! Build exciting projects and toys using the included colorful instruction book!.Ideal for ages:8 years and up
- PROJECTS THEY'LL LOVE: So many fun electric-powered projects you can make and play! Ages 8 to 108 will love building 100+ projects! Have fun while building practical skills and learning the basics of circuitry. Build a flying saucer in a snap and watch it take off and sound the alarm! Kit includes 29 Snap Circuits parts.
- GREAT GIFT Give the gift of learning and fun this holiday season! Snap Circuits kits will keep kids busy and having fun all year round. Combine with other Snap Circuits kits for even more projects!
- NO EXTRA TOOLS NEEDED Elenco Snap Circuits kits include everything you need to start learning immediately - and more. Unlike traditional electronics kits, no soldering or tools are required to build. The numbered and color coded pieces snap easily onto the included plastic grid. Batteries required.
- AWARD WINNING KITS! We're proud to produce high quality products loved by kids, parents,and educators. Snap Circuits kits have won a number of awards - including the Specialty Toy of the Year Award, Seriously STEM! award, Good Housekeeping's Best Toys, Purdue University's Engineering Gift Guide, National Parenting Center's Seal of Approval, Toy Insider's Top Holiday Toys, placement on the Dr. Toy list of 100 Best Children's Products and placement on the Dr. Toy list of Best Educational products, and the "Stem Approved" Trustmark from Stem.org.

I'm Dead, Now What?: Important Information About My Belongings, Business Affairs, and Wishes
- Peter Pauper Press (Author)
- English (Publication Language)
- 96 Pages - 02/01/2015 (Publication Date) - Peter Pauper Pr (Publisher)

Macbeth (Folger Shakespeare Library)
- Shakespeare, William (Author)
- English (Publication Language)
- 304 Pages - 07/01/2003 (Publication Date) - Simon & Schuster (Publisher)
Related Products:
- Scratch For Dummies
- Computer Scripts For Dummies
- Sql Scripts For Dummies
- Scratch For Kids For Dummies
- Building A Computer From Scratch For Dummies
- Av Blocks For Dummies
- Cardiac Blocks For Dummies
- C++ For Dummies Code Blocks
- Cidr Blocks For Dummies
- Order Blocks For Dummies
- Command Blocks For Dummies
- Understanding Heart Blocks For Dummies
- Crown Moulding Blocks For Dummies
- Heart Blocks For Dummies
- Code Blocks C++ For Dummies
Last update 2021-09-03. Price and product availability may change.